I’ve learned that when riders ask whether Harley-Davidson motorcycles are easy to customize, they’re really asking two things at once: how simple it is to bolt on parts, and how realistic it is to build a bike that actually fits their body, budget, and riding style. From what I’ve seen in shops, online communities, and brand guidance, Harleys are built with customization in mind, but getting it right still takes planning, patience, and a clear sense of what you want from the bike.
Instead of thinking of customization as a single big project, I look at it as a series of small, deliberate choices—starting with comfort and safety, then moving into style and performance once the basics feel dialed in. When I follow that order, the process feels far less intimidating, and the huge aftermarket catalog that surrounds Harley-Davidson turns from overwhelming into empowering.
Why Harleys Are So Custom-Friendly
From a purely mechanical standpoint, Harley-Davidson motorcycles are among the easiest big bikes to customize because they’re designed around modular parts and shared platforms. Many models share frames, mounting points, and electrical layouts across several years, which means a huge range of seats, bars, exhausts, and lighting kits will bolt on with minimal fabrication. That’s why so many riders and dealers describe Harleys as a blank canvas: the factory gives you a solid base, and the aftermarket fills in almost every imaginable look and function, a point echoed in guides that walk through how Harley-Davidson motorcycles are built to accept accessories.
Ease of customization also comes from the culture around the brand. There are step-by-step videos, dealer clinics, and rider forums dedicated to specific models and mods, so you rarely have to figure things out alone. When I watch experienced owners swap handlebars or install slip-on mufflers in real time, it’s clear that a lot of common upgrades can be done in a home garage with basic tools, especially on popular platforms like the Sportster, Softail, and Touring families. That combination of modular engineering and a massive knowledge base is what makes Harleys feel approachable even to first-time modifiers.
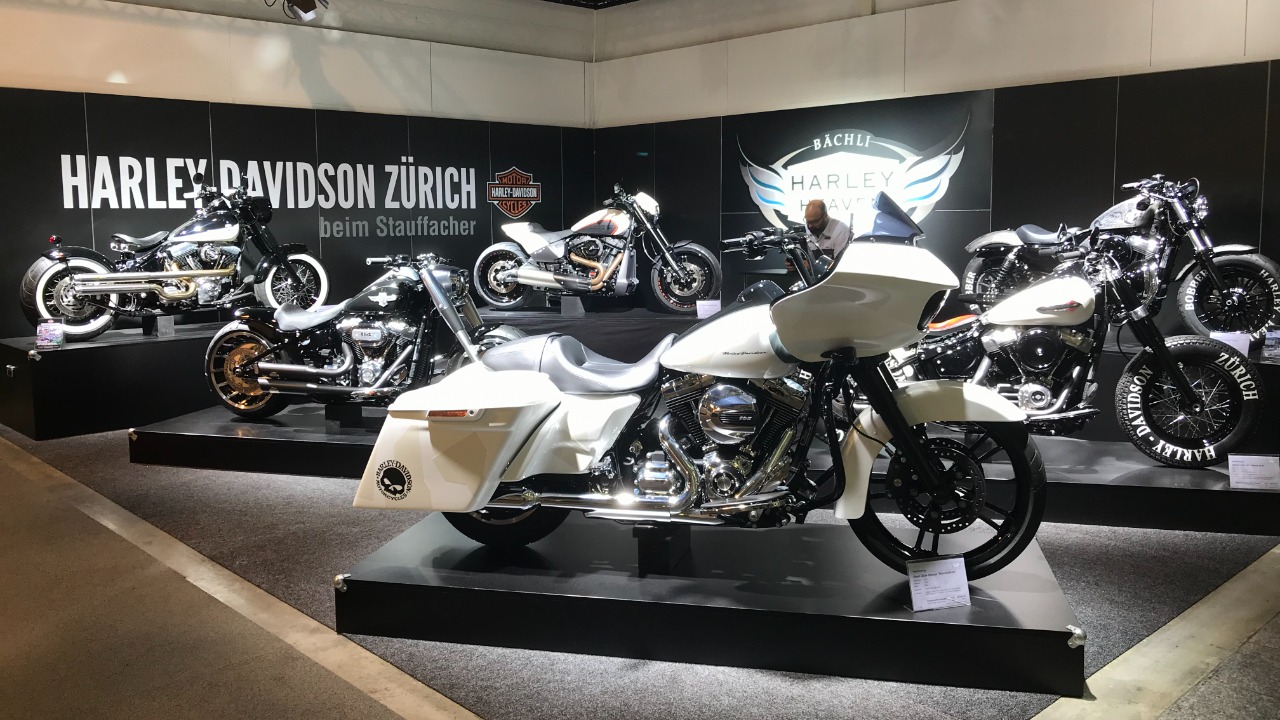
Choosing the Right Harley as a Custom Platform
Before I think about parts, I look at the type of Harley I’m starting with, because some models lend themselves to certain builds more naturally than others. The brand itself breaks its lineup into categories like cruisers, touring bikes, trikes, and adventure models, and each one responds differently to customization. A low-slung cruiser is a natural fit for bobber or club-style builds, while a full-dress touring bike is better suited to comfort and tech upgrades; that’s why I always recommend reading through the official overview of Harley-Davidson motorcycle types before committing to a direction.
Once I understand the base platform, I can be more realistic about what’s easy versus what’s a major project. Turning a bagger into a stripped-down bar hopper means removing a lot of factory equipment, rerouting wiring, and potentially changing suspension geometry, while turning a cruiser into a light tourer might be as simple as adding a quick-detach windshield and bags. Dealers and customization guides often suggest starting with a model that’s already close to your end goal, because the closer the stock bike is to your vision, the less money and effort you’ll spend fighting its original purpose.
Where to Start: Comfort, Controls, and Safety
When I talk to riders who are happy with their custom Harleys years later, almost all of them say they started with ergonomics and safety rather than paint or chrome. The first step is usually dialing in the rider triangle—how your hands, feet, and seat line up—so the bike fits your body. That can mean swapping to a different seat height, choosing mid or forward controls, or changing handlebar rise and pullback, all of which are common first mods in dealer advice on where to start and what to consider when customizing a Harley.
After comfort, I look at visibility and control: better lighting, upgraded mirrors, and quality tires often make a bigger difference to real-world riding than a louder exhaust. Many shops recommend LED headlight conversions, auxiliary lights, and improved brake pads as early upgrades because they’re relatively simple bolt-ons that dramatically improve safety. When those basics are sorted, the bike feels more confidence-inspiring, which makes it easier to enjoy the more cosmetic or performance-focused changes that come later.
How Much Can You Really Do at Home?
One of the reasons I consider Harleys easy to customize is that a surprising amount of work can be done in a driveway with hand tools, especially if you’re willing to follow detailed video walkthroughs. Common jobs like installing slip-on mufflers, swapping seats, adding engine guards, or bolting on luggage racks are well within reach for a patient beginner. In many how-to videos, creators show step-by-step installs on popular models, demonstrating that basic upgrades like exhaust and intake changes can be handled at home with guidance from a detailed Harley customization tutorial.
That said, I draw a line when it comes to structural or safety-critical work. Anything involving internal engine components, ABS brake systems, or major electrical changes is usually better left to a qualified technician with the right tools and diagnostic equipment. Even experienced home mechanics often choose to have a dealer flash the ECU after performance upgrades or handle complex wiring for audio systems and advanced lighting. The beauty of the Harley ecosystem is that you can mix and match: do the straightforward bolt-ons yourself to save money and build confidence, then lean on professional help for the jobs where a mistake could be expensive—or dangerous.
Community Inspiration and Real-World Builds
Whenever I’m unsure what direction to take a build, I look at what other riders have already done with the same model. Social platforms and owner groups are full of real-world examples that show how far you can push a Harley without losing reliability. In one active rider community, owners share photos and parts lists for everything from lightly accessorized daily riders to fully transformed show bikes, and the comment threads under a busy Harley customization group post show how much practical advice you can get just by asking what worked—and what didn’t—for someone else.
Beyond groups, I’ve seen individual riders document their entire customization journey, breaking down each change into manageable steps. One detailed build diary walks through swapping bars, adding a fairing, changing out the exhaust, and fine-tuning the stance on a single bike, with before-and-after photos that make the transformation feel achievable. That kind of storytelling, like the photo-heavy breakdown of a personalized Harley shared in a step-by-step customization post, turns abstract ideas into concrete plans you can adapt to your own machine.
Balancing Style, Performance, and Practicality
It’s tempting to chase a specific look you’ve seen online, but I’ve learned that the best custom Harleys balance style with how and where you actually ride. If you spend most of your time on long highway trips, a slammed suspension and tiny seat might look cool but feel miserable after an hour; if you ride mostly in the city, giant saddlebags and a tall touring windshield may be more hassle than help. Dealer customization guides often emphasize this trade-off, encouraging riders to think about how each change affects comfort, handling, and storage, not just aesthetics, when they plan a unique Harley-Davidson ride.
Performance upgrades bring their own balancing act. A freer-flowing exhaust and high-flow intake can add power and sound, but they may also require tuning to keep the engine running correctly and within safe temperature ranges. Suspension upgrades can dramatically improve ride quality and cornering, yet they also change seat height and ground clearance. I’ve found that mapping out upgrades in stages—first ergonomics, then safety, then performance, and finally cosmetic touches—helps keep the bike rideable at every step instead of turning it into a long-term project that’s always half apart in the garage.
Working with Dealers, Shops, and Pro Builders
Even if you enjoy wrenching, there’s real value in building a relationship with a local Harley-Davidson dealer or independent shop. Many dealerships offer customization consultations where staff walk you through accessory catalogs, explain compatibility, and help prioritize upgrades based on your budget and riding style. Some even publish their own guides to popular mods, outlining how to personalize everything from seats and bars to audio and lighting, similar to the way one dealership breaks down Harley-Davidson customization options for riders who want a more tailored machine.
Professional builders and shop techs also bring experience you can’t get from a catalog. They’ve seen which parts fit together cleanly, which brands hold up over time, and which combinations cause headaches down the road. In some cases, they’ll steer you away from a flashy but impractical mod toward something that better suits your riding habits. I like to think of them as partners rather than just service providers: I can handle the simple bolt-ons, and they can step in for complex wiring, tuning, or fabrication when a project goes beyond my comfort zone.
Learning from Video Walkthroughs and Tech Tips
For visual learners, video walkthroughs have become one of the most powerful tools in the Harley customization toolkit. Watching someone install the exact part you’re considering on the same model you own takes a lot of guesswork out of the process. Many creators film detailed sequences showing how to remove stock components, route cables cleanly, and torque fasteners correctly, which is especially helpful for jobs like handlebar swaps or fairing installs. A good example is a multi-part series where a rider methodically upgrades controls, lighting, and exhaust on a single bike, as seen in a comprehensive Harley modification video that walks through each step.
These videos also highlight common pitfalls—like stretching brake lines too tight with taller bars, or pinching wires when reinstalling bodywork—so you can avoid them on your own bike. Some channels go further, offering test rides and impressions after each mod so you can hear how an exhaust actually sounds on the road or see how a suspension change affects ride height. I’ve found that pairing these visual guides with written checklists from dealers and parts manufacturers gives me the confidence to tackle more ambitious projects without feeling like I’m flying blind.
Sound, Exhaust, and the Legal Side of Customization
Exhaust swaps are one of the most popular Harley mods, and they’re a big part of why many riders feel the bikes are easy to personalize. Slip-on mufflers can usually be installed with basic tools, and they immediately change the sound and look of the bike. However, I always remind myself that louder isn’t always better—or legal. Noise regulations vary widely by region, and some aftermarket systems that sound great in a video may attract unwanted attention on local streets. That’s why I pay close attention to how exhaust options are tested and presented in review videos, such as a detailed Harley exhaust comparison that lets you hear different setups back-to-back before you buy.
Beyond noise, emissions rules and inspection requirements can affect which parts are allowed on street-legal bikes. Some performance components are labeled for “race use only” or off-road use, and installing them on a street bike can create problems during inspections or roadside checks. When I’m planning an exhaust or engine upgrade, I make a point of checking whether the part is approved for my area and whether it requires a tune to keep the bike running within safe parameters. It’s one more reason why working with a knowledgeable dealer or shop can save you headaches: they’re usually up to speed on local regulations and can steer you toward compliant options that still deliver the sound and performance you want.
Putting It All Together: A Custom Harley That Still Feels Like Yours
When I step back and look at everything that goes into customizing a Harley-Davidson, the overall picture is encouraging: the bikes are built to accept a wide range of accessories, the aftermarket is enormous, and the community support is deep. That combination makes them genuinely easy to personalize compared with many other brands, especially if you approach the process in stages and lean on the resources available—from dealer guides and pro shops to rider forums and detailed Harley customization advice that walks through common upgrades.
For me, the key is remembering that a custom Harley doesn’t have to be radical to be successful. Sometimes the most satisfying builds are the subtle ones: a seat that finally fits, bars that ease the strain on your shoulders, lighting that makes night rides less stressful, and a few carefully chosen touches that reflect your personality. When you prioritize fit, safety, and function first, the style naturally follows—and that’s when the bike stops feeling like something you bought and starts feeling like something you built.
More from MorningOverview